



CATHIE FILIAN's Handmade Happy Hour

Crafty Mom - Mess Maker - Content Creator

Find and Follow Me Here!

Facebook240
YouTube40
YouTube
Set Youtube Channel ID
Pinterest15
Pinterest
fb-share-icon
Instagram38
Tiktok46
  • Hello!
    • Hello! I’m Cathie Filian
    • Let’s Link Up!
    • News + Updates
    • The Filian Family
    • Featured On
    • Television
      • Creative Juice – HGTV
      • Craft Wars – TLC
      • Witch Crafts – DIY Network
      • Creative Juice Holiday Special
      • HSN and QVC
      • EMMY Awards
    • Product Design
      • Mod Melter, Molds & Melts
      • Mod Podge Accessories
      • Hot Glue Gun Helpers
      • Jewel Box POP
      • Product Design Awards
    • Books by Cathie
      • 101 Tees
      • 101 Snappy Fashions
      • DecoDen Desserts
      • Bow Wow WOW!
      • Creative Juice Book
      • Contributed + Featured
    • diary
  • YouTube
  • Holidays & Celebrations
    • Christmas
    • Halloween
    • Easter
    • Valentines Day
    • New Year’s Eve
    • St. Patrick’s Day
    • 4th Of July
    • Thanksgiving
    • Weddings
    • Baby Shower
    • Mother’s Day
    • Father’s Day
    • Party Ideas
    • Game Day
    • Graduation
    • Teacher Gifts
  • Character DIYs
  • Crafts
    • Mod Podge Crafts
    • DIY Videos
    • Fashion
    • Sewing Projects
    • DIY Beauty
    • Home and Garden
    • Furniture Flip
    • Clay and Resin
    • Resin
    • Scrapbooking
    • Ideas for Kids and Families
    • PTA School Projects
  • Eat & Drink
  • Hello Crafty Kids
  • HGTV’s Creative Juice
  • Amazon Shop
  • Theme Parks & Cool Places

DIY Wedding Favors – 11 Ideas

February 18, 2010 · by: Cathie Filian

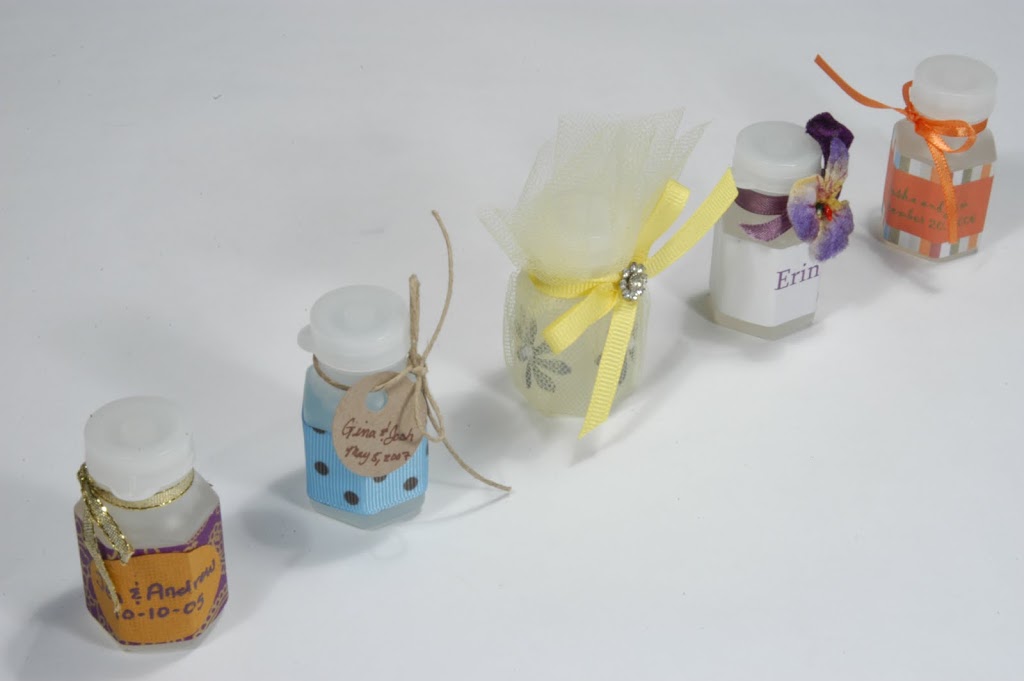
Embellished Bubbles – see below for instructions

Wedding season is just around the corner and busy brides and grooms are working on all the details. Oh so many details when it comes to weddings. One easy DIY detail is the wedding favor. Many favors can be made by hand in advance or you can doctor up store bought items. Don’t forget to enlist friends and family for help!
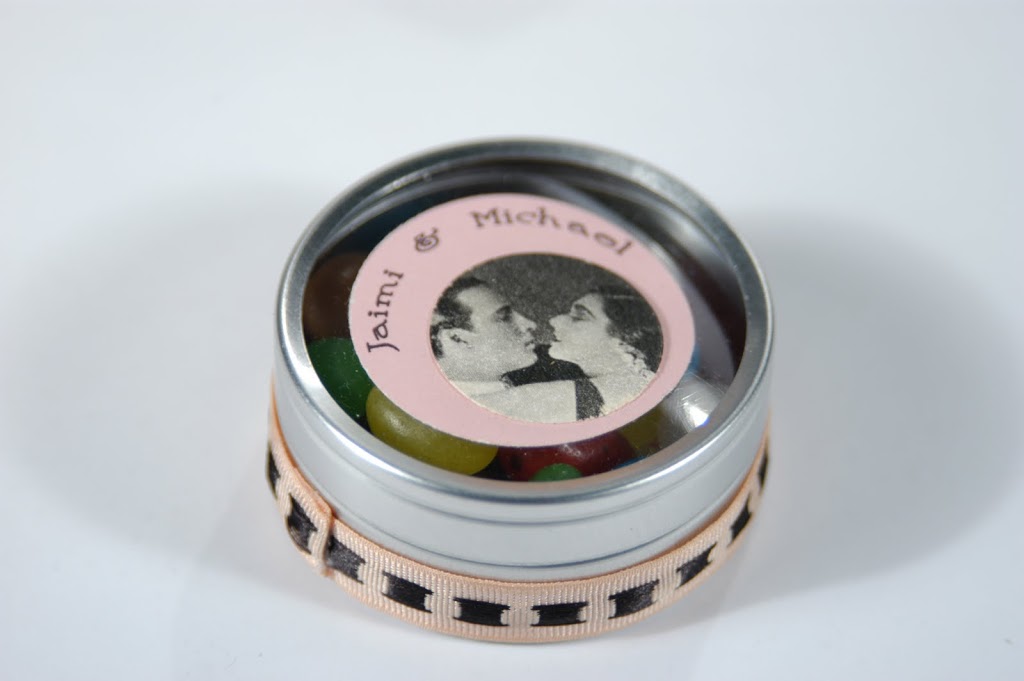
Ribbon Wrapped Candy Tins


Supplies:

Clear top candy tins
Candies of choice
Round punched tags
Decorative ribbon
Glue

Steps:
Glue the ribbon around the tin canister, fill with candies and glue a decorative tag in the center of the clear top.
________________________

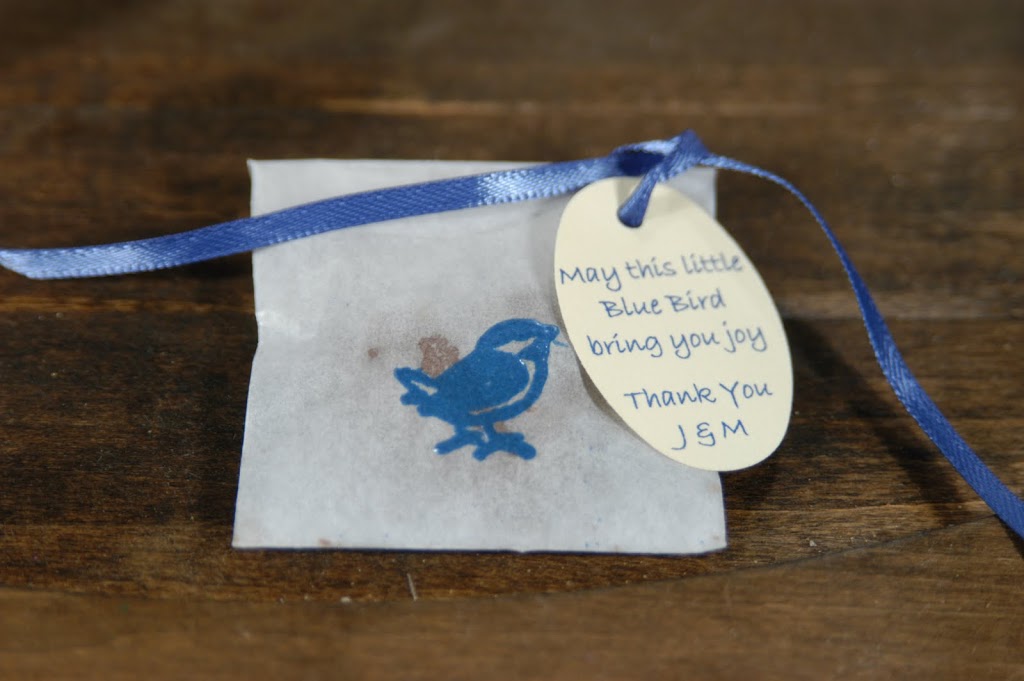
Embossed Glassine Sleeves with Chocolate Hearts


Supplies:

Chocolate for melting
Candy molds
Cookie sheet
Ramekins
Oven
Glassine sleeve – Photo supply or craft store
Small rubber stamp
Embossing stamp pad
Embossing powder
Embossing or heat gun
File folder
Decorative tag
Hole punch
Ribbon – 6” per favor
Spoon

Steps:
1. Microwave the chocolate on low for one minute, then in additional 30-second intervals, stirring each time. When the chocolate is smooth and fully melted, it is ready to be poured into the molds.

2. With a spoon, fill each section of the mold with melted chocolate. Gently tap the mold to remove any air bubbles.

3. Allow to cool and pop out the chocolates. Use the edge of a knife to remove any extra bits of chocolate.

4. Emboss an image on the glassine sleeves, if desired. Stamp the rubber stamp using embossing ink and sprinkle embossing powder on the wet ink. Tap off excess powder. Work over a file folder so you can funnel the excess back into the embossing powder jar. Heat with the embossing or heat gun until the embossing powder has melted.

5. Place a few chocolates in a glassine sleeve, fold over the top edge of the sleeve.

6. Punch one hole in the top center of the tag. Punch a matching hole in the top center of the decorative tag.

7. Layer the tag over the glassine sleeve. Fold the ribbon in half, thread the looped end through the holes and loop the tails back through the folded loop. Trim the ends on an angle.
________________________

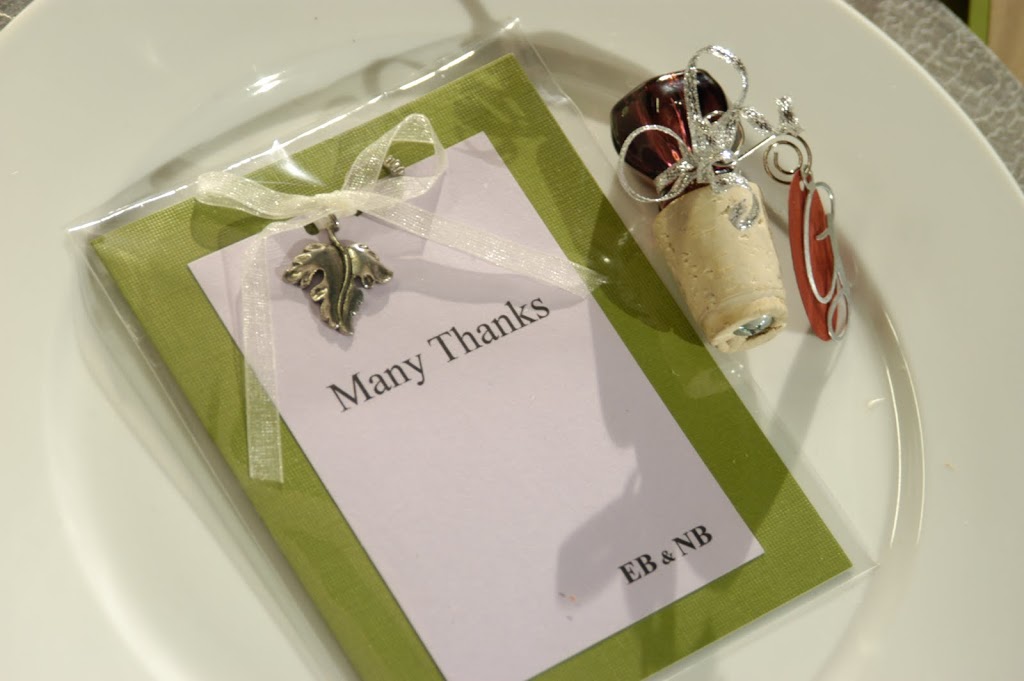
Charmed Thank You Card and Wine Stopper

Supplies for Card:
Clear flat bags (to fit card)
4” X 6” Folded Card
3” X 5” Flat Card
8” piece of ribbon
Pewter Charm (significant to the bride and groom)
Hole Punch (small diameter)
Glue Stick

Steps:
1. Print the bride and grooms initial on the lower portion of the 3” X 5” card.

2. Print or handwrite a thank you note in the inside of the 4” X 6” folded card. You can also include a note about the significance of the charm. An Irish couple may choose a 4 leaf clover, if you are having a wedding at a winery you might choose a small bunch of grapes charm etc.

3. Center the flat card over the front flap of the folded card. Punch 2 holes about 1/4” apart through both the flat card and the front flap of the folded card. You should punch the holes approximately 1/2” down from the top. You can use two traditional round hole punches, or you can punch once with a “ribbon lace” punch that provides two slits in the card.

4. Thread the ribbon through the holes, lacing the smaller card to the larger card, and tie on a charm. Trim the ends of the ribbon.

5. Slide the card into the clear flap envelope and seal the back.

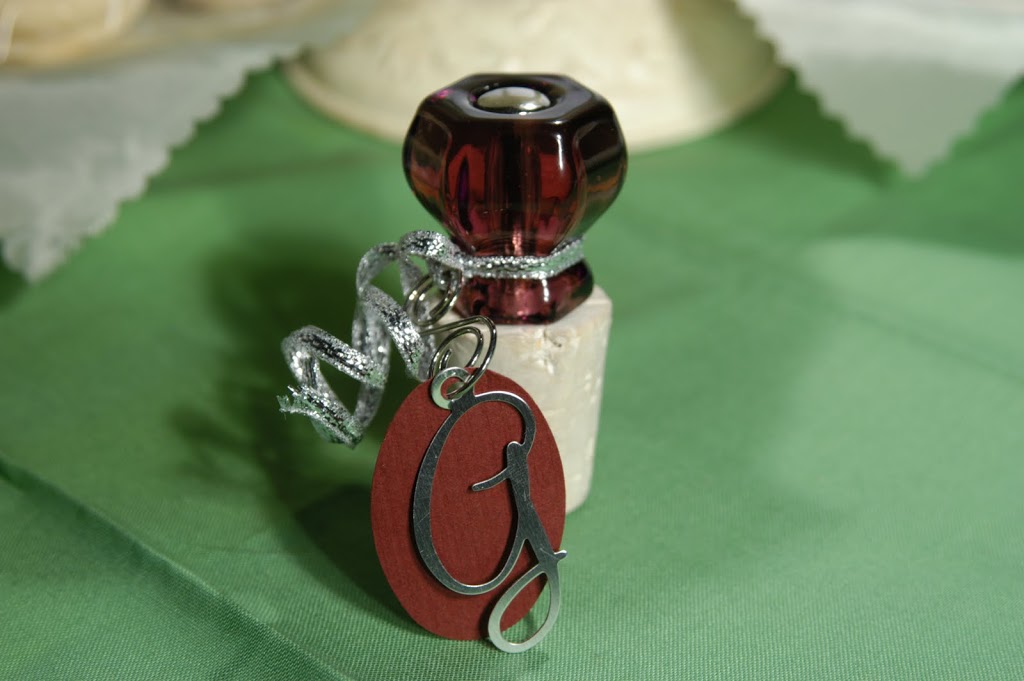
Supplies for Wine Stopper:
Wine cork
Decorative drawer pull
Craft drill
Screwdriver
Decorative metal initial—found in the scrap booking section of craft stores
Thin wire-edged ribbon
Cardstock
Hole punch
Oval punch

Steps:
1. Drill a hole into the center top of the cork. Make sure the hole is slightly larger than the stem of the drawer pull.

2. Screw until the pull is secure with a screwdriver.

3. Punch an oval of cardstock and punch with a hole punch. Attach a metal initial—a monogram—with ribbon, backed by the cardstock oval. Alternatively, you could thread the oval and letter on a scrapbooking metal curly-q. Curl the ends of the wire-edged ribbon.
________________________
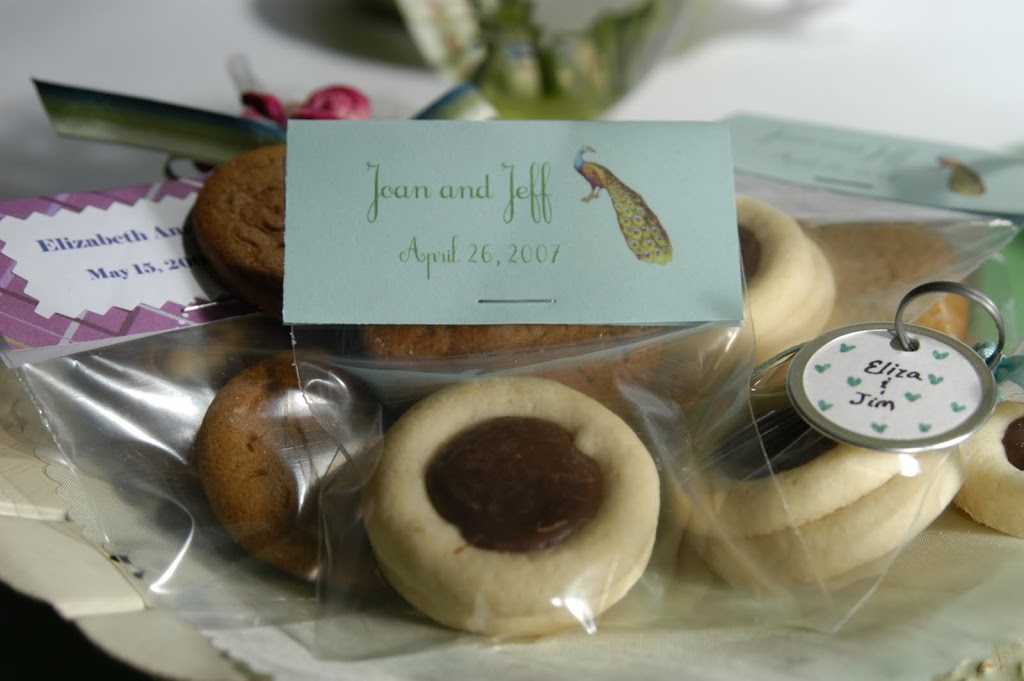
Quick Cookie Packaging

Supplies:
Large homemade, bakers, or grocery store cookies
Clear cookie bags – flat
Cardstock
Printer
Stapler

Steps:
1. Place the large cookie in the bag.

2. Cut a square of cardstock the same width as the opening of the plastic bag. Print the lower half of the card with the couple’s names. Flip the square and print with a saying or other text, oriented through the printer so that this text is upside down relative to the couple’s names.

3. Fold the cardstock square in half and sandwich the cookie bag. Staple twice across the bottom of the tag. Now the text is right side up on both sides!

________________________

Bubble Bottle Makeover

Supplies:
bubble bottles
scrap paper
glue stick
ribbons
flowers
glue

Steps:
1. Trim the papers to fit around the bottles. Use punches to create decorative shapes. Attach to the bottle with a glue stick.

2. Tie ribbons around the neck and add additional embellishments if desired.
________________________

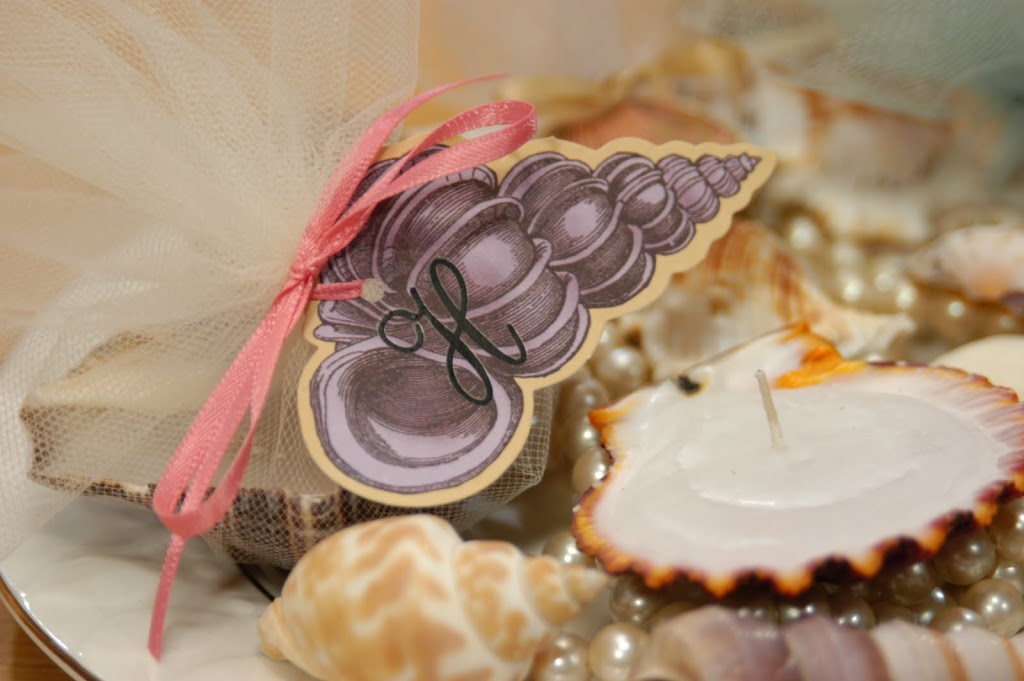
Sea Shell Soy Candles From the Microwave

Supplies:
Paper or paper bags
Bowl
Soy wax pellets
Microwave
Wick and metal wick holder (both available at craft stores)
Shells
Disposable pipettes—available at candle- and soap-making stores on-line
Small dish
Old knife
Tulle Circles
Ribbon
Sea-themed die-cut
Rub-on letters

Steps:

1. Choose your shells — the ones with deeper cavities will hold more wax and burn the longest. Clean them in a mild solution of water and bleach, and rinse with cold water.

2. Crumple paper or a paper bag and put in a bowl. Place the shell on the crumpled paper and arrange it so that it is flat. This will stabilize the shell while you are pouring wax.

3. Place the wick with pre-attached metal wick holders, which are great for shallow vessels — into the center of the shell.

4. Melt soy wax in the microwave, per the package instructions. Use the disposable pipette-to-pipette wax in to the shell.

5. Allow the wax to cool for at least 30 minutes — although the surface may look hard sooner, the wax underneath takes this long to fully harden. Trim wicks.

6. Choose a sea-themed die-cut. Rub-on an initial. The back of a paintbrush or a popsicle stick can be used to rub the letter.Place the candle in the center of a tulle circle, wrap the candle and attach the monogrammed die-cut with a ribbon.
________________________

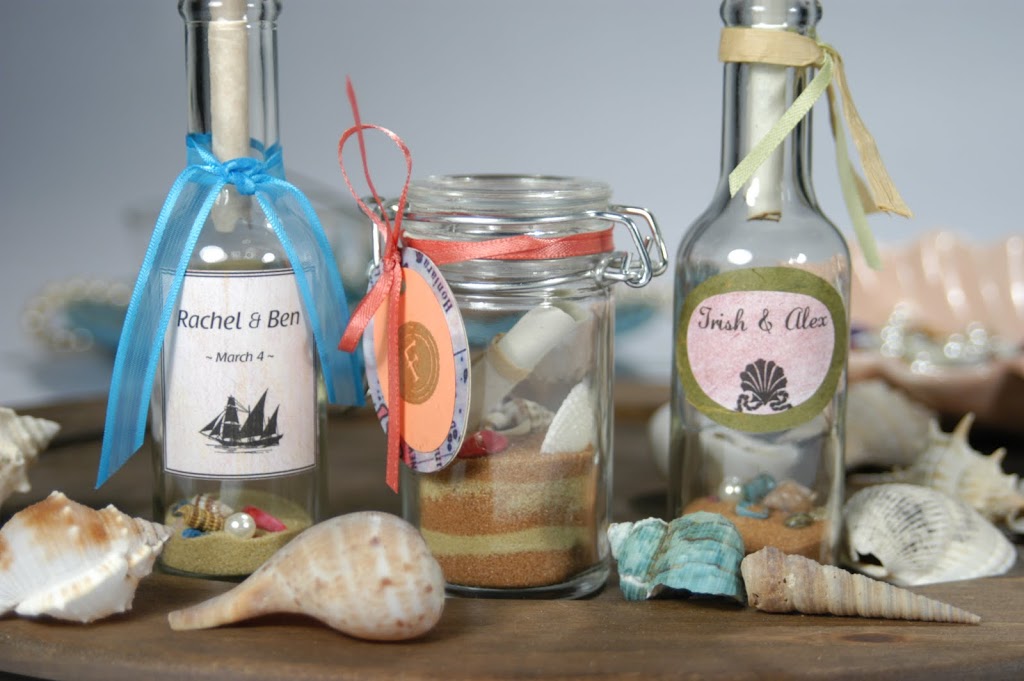
Message in a Bottle

Supplies:
Sand—in different natural-toned colors
Small sauce-sized bottle
Tiny shells
Small pearl beads
Ribbon
Sticker paper
Printer
Printed poem or “Thank You” note on parchment paper

Steps:
1. Add a few spoonfuls of sand to the bottle—you can layer different natural-tone colors and a few shells and/or pearls into the bottle.

2. Print small rectangle labels with the couple’s names and an image on sticker paper. Stick to the bottle.

3. Trim the printed poem or thank you to the appropriate size for the bottle. Scroll the printed poem—you can use a pencil to roll it.

4. Place the scroll halfway into the bottle. Tie the neck of the bottle with a decorative ribbon.
________________________


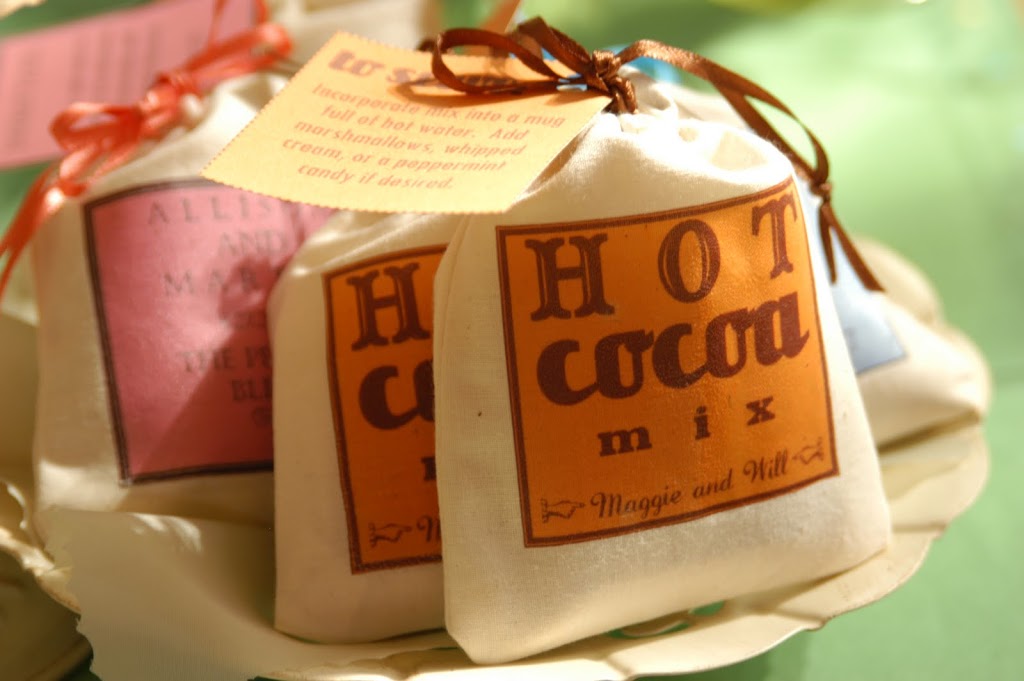
Hot Coco To Go

Supplies:
Large tub or bowl
1 pound cocoa (4 cups)
2 pounds granulated sugar (4 cups)
6 pounds dry milk (15 cups)
1-teaspoon salt
Small plastic zip top bag
Muslin parts bags
Iron-on transfer paper
Ink jet printer
Iron
Small printed cocoa instructions note

Steps:
1. Sift cocoa, if necessary. Mix with sugar, dry milk and salt.

2. Transfer a scoop into a small plastic bag and seal with a tie.

3. Design and print your image to transfer on a computer and ink jet printer. Reverse any text if necessary, as indicated on the transfer paper instructions. Trim the edges of the transfer if needed. Following the instructions on the transfer paper, iron the design to the front of the muslin parts bag.

4. Fill the bag with the plastic bag of cocoa and tie on the instructions tag. Tie a bow with the strings.
________________________

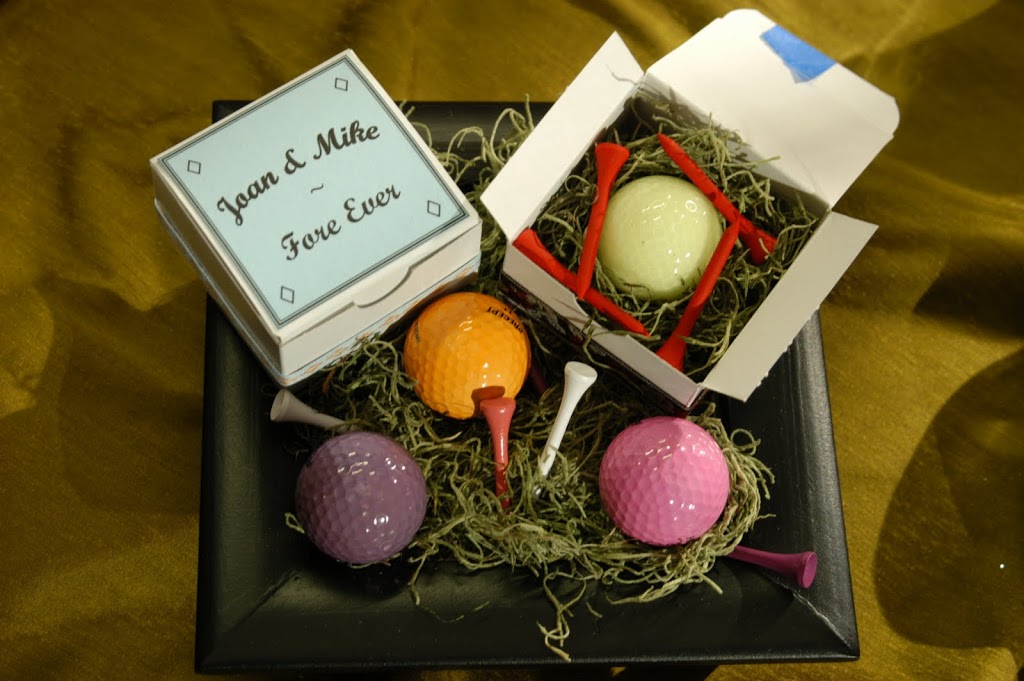
Golf Themed Wedding Favor

Supplies:
Golf ball
Golf tees
Small cardboard jewelry box 3” X 3”
Moss
Decorative ribbon
Craft glue
Decorative paper
Paper glue
Rit Fabric dye

Steps:

1. Use craft glue to attach a decorative ribbon around the lower portion of the box.

2. Print the bride and grooms initials and the words “Fore Ever” on a piece of decorative paper. Trim the paper to 2.75” X 2.75”.

3. Center the paper over the top of the lid and glue in place using paper glue.

4. You can dye the golf balls by making a dye bath per the dye manufacturer’s instructions, and soaking the balls in the bath for approximately half an hour.

5. Fill the box with moss and place the golf ball in the center with the golf tees around the ball.
________________________

Porcelain Ornaments

Supplies:
Porcelain ornament blank
Embossing powder
Metallic ink
Rubber stamp
Porcelain paint pen
Ribbon
Spray matte sealer

Steps:
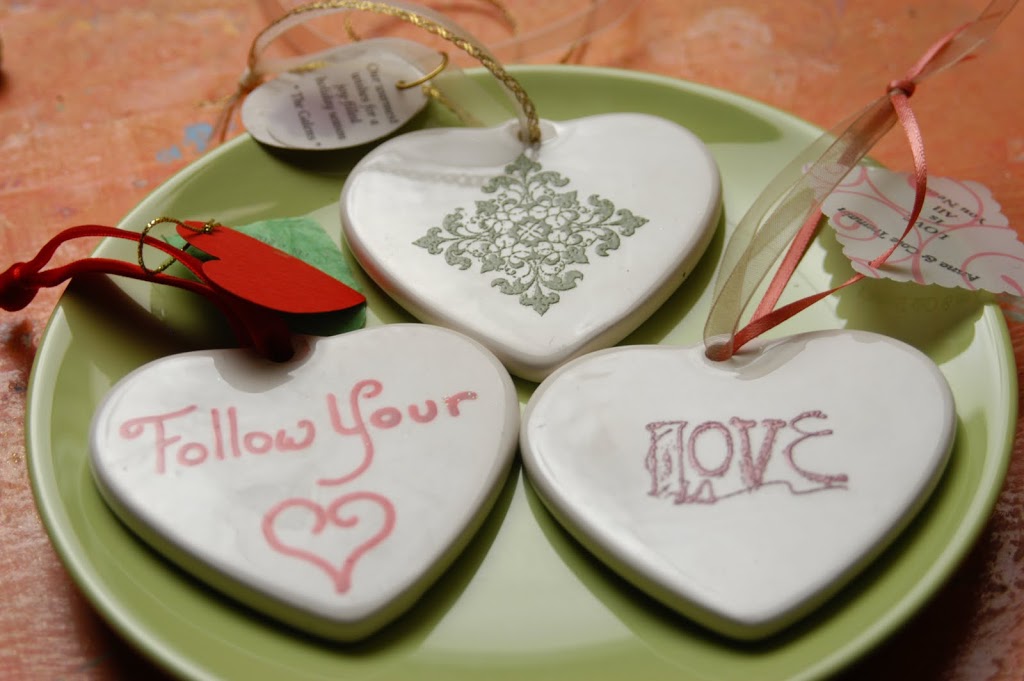
1. Use a rubber stamp, metallic embossing powder and a heat gun to achieve an elegant gilded and raised effect by stamping a design onto the ornament blank. Stamp the rubber stamp using embossing ink and sprinkle embossing powder on the wet ink. Tap off excess powder. Work over a file folder so you can funnel the excess back into the embossing powder jar. Heat with the embossing or heat gun until the embossing powder has melted. The heat setting process will take longer on porcelain than it does on paper. Brush markers will give the stamped design a soft color.

2. Add a message to the back of the ornament with a porcelain paint pen. Allow to cure for 24 hours.

3. Spray the ornament with a matte-finish sealer for lasting durability. Attach a ribbon for a hanger, or epoxy a magnet to the back. Add a tag.

(Visited 1,269 times, 1 visits today)

Posts you might be interested in......

  • 11 DIY Wedding Favors on Tomorrow's Creative Juice on DIY Network.

       Steve and I are making…

  • Glue Gun Spiderwebs

    Glue Gun Spider WebsSupplies:Hot Glue…

  • Tutorial: Super Girly Card with Hot Glue Gun Helpers!

    Super Girly Card with Hot…

  • Dye stripes with Elmers Glue and Rit Dye

    Carousel Tote Bag for RIT…

  • Make it: DIY Funky Folded Envelopes

    Make it: DIY Funky Folded…

Category: Weddings

Follow Us

Facebooktwitterpinterestrssyoutubeinstagram
❮ ❮ Week 2 – 101 Snappy Fashions Giveaway
make it: pipe part candle holders ❯ ❯

Comments

  1. Anonymous says

    February 18, 2010 at 5:38 pm

    What great ideas. My daughter is getting married and will be showing her your ideas. Thank you very much for sharing.

  2. Katie's Nesting Spot says

    February 18, 2010 at 7:03 pm

    Great variety of idea and so creative!

  3. Eileen Bergen says

    February 19, 2010 at 3:17 pm

    What great ideas. I especially like the elegant wine stopper. It would make a perfect hostess gift as well.

  4. Sherri O. says

    February 19, 2010 at 5:52 pm

    Thanks for sharing all of these ideas! Perfect timing as I am helping my daughter plan her wedding right now. 🙂

  5. Margot Potter says

    February 19, 2010 at 5:57 pm

    Wow! Fabulous ideas. You are a crafty guru, my friend!

    Cheers,
    Madge

  6. Jacky {The Sweetest Petunia} says

    March 1, 2010 at 5:42 pm

    Love these ideas! I’m not planning on a beach-themed wedding, but I think the seashell candles are a lovely idea. Thanks for sharing!

  7. bridal says

    March 5, 2010 at 5:38 am

    Giving guests favors is an excellent way of showing your utmost gratitude.It is better to make it in your own,something with your own touch..and those are great wedding favor ideas!Perfect for beach wedding theme..Thanks for sharing!

  8. Amberdawn says

    March 7, 2010 at 8:54 pm

    Nice ideas! I’m planning a wedding, and wasn’t sure what sort of favors to give. The wine stopper looks so nice plus it’s practical, I love it!

  9. Koozies says

    March 13, 2010 at 12:50 am

    All are so cute. But of them, I love card most which are not really complex but quite simple to made. Small gifts but very meaningful.
    Koozies

  10. Nancy Ward says

    April 4, 2010 at 10:00 pm

    Hi!

    Today I posted an entry on my blog with a link to this article.

    I’d appreciate your letting me know if that’s OK.

    Thanks,

    Nancy Ward
    http://paperfriendly.blogpsot.com

  11. Chocolate Wedding Favors says

    May 17, 2010 at 1:37 am

    Lovely designs…

  12. Koozies says

    May 21, 2010 at 3:48 am

    I just wanted to add a comment here to mention thanks for you very nice ideas. Blogs are troublesome to run and time consuming thus I appreciate when I see well writen material. Your time isn’t going to waste with your posts. Thanks so much and stick with it No doubt you will defintely reach your goals! have a great day!

  13. vintage rings says

    August 31, 2010 at 3:33 am

    What A Brilliant Idea !! My Lovely sister getting married next month. Your ideas are superb. I will take in to consideration..

  14. Emma says

    February 23, 2011 at 12:42 pm

    What brilliant ideas! I have just recently started a blog myself all to do with weddings and have just posted an entry today which mentions your golf ball idea (which I have linked to). Please let me know whether or not you mind me doing this.

    Thanks very much,
    Emma
    http://misshopelessromantic.wordpress.com/

Trackbacks

  1. Crafty Links says:
    April 3, 2015 at 7:25 pm

    […] with a recycled soda can and polymer clay heart and some Lisa Kettell news about her Art Opera.Cathie Filian Check out Cathie’s blog for 11 DIY wedding favor ideas. Aileen’s Musings This week […]

  2. 11 DIY Wedding Favors on Tomorrow’s Creative Juice on DIY Network. says:
    April 4, 2015 at 1:57 pm

    […]  Steve and I are making 11 different wedding favors on Tomorrow’s Creative Juice. VISIT THIS LINK FOR ALL THE INSTRUCTIONS   We are archiving projects from Creative Juice at our facebook […]

Find and Follow Me Here!

Facebook240
YouTube40
YouTube
Set Youtube Channel ID
Pinterest15
Pinterest
fb-share-icon
Instagram38
Tiktok46

Search

Shop my Amazon Store! I earn from qualifying purchases.

Cathie Filian

Follow along on my adventures!

Facebooktwitterpinterestrssyoutubeinstagram

Creative Juice on Discovery+

USA Embroidery Kits – Home Sweet Stitch – Now Available at ALL Walmart Stores!

New Videos at TikTok!

InstaLOVE

cathiefilian

DIY Halloween Spell Book! Create a Ghost Story Dio DIY Halloween Spell Book! Create a Ghost Story Diorama inside the pages of a book....Plus learn tips and tricks for creating spooky book covers! When crafting with books, please do so responsibly. Ask your local libraries and thrift shops for free books that are being sent to recycling. #halloween #crafts #halloweendecor
Elevate your game day purse with a DIY bag charm a Elevate your game day purse with a DIY bag charm and football patch! This tutorial is so quick and easy… and perfect for clear stadium bags! #diy #gameday #gamedayoutfit
Come with me… A day at YouTube… with Walmart and D Come with me… A day at YouTube… with Walmart and Dental Digest! So much fun and always something new to learn! #contentcreator
Midsummer Scream! It was such a blast and we met s Midsummer Scream! It was such a blast and we met so many cool people. Sophia got to try on Dracula’s cape! We met the OG actors from Scream and Bob Gurr! The Universal booth was so cool! #midsummerscream #halloween #horrorgram
Photo Transfer 101! Learn all the steps to transfe Photo Transfer 101! Learn all the steps to transfer your photos to fabric! I love doing this for customized gifts! #phototransfer #crafts #diy #handmade
Napkin Decoupage Sea Shells! These make adorable d Napkin Decoupage Sea Shells! These make adorable decor and gifts! I’m using satin Mod Podge and gold paint. #diy #crafts #beachvibes
DIY Dollar Tree Haunted House Decoupage Pumpkin! M DIY Dollar Tree Haunted House Decoupage Pumpkin! Made with Mod Podge, paper napkins and a toy dollhouse from Dollar Tree. Add fairy lights for a glow look! #crafts #dollartree #halloween
DIY Map Jewelry that looks boutique! Easy Mod Podg DIY Map Jewelry that looks boutique! Easy Mod Podge Hack!  I love making these necklaces as gifts, you can customize the pendants to any city! This decoupage technique works with scrapbook paper too. The glass like finish is Mod Podge Dimensional Magic. 

#Modpodge #jewelrymaking
Transform Dollar Tree plates into Halloween magic Transform Dollar Tree plates into Halloween magic with napkin decoupage and Mod Podge! #diy #crafts #halloween
DIY a Halloween rib cage dress! I’m using Mod Podg DIY a Halloween rib cage dress! I’m using Mod Podge, paint and lace to create custom spooky Halloween fashion! I started with a plain black dress but you can do this on any color. #diy #halloweencostume #halloween
Don’t be afraid to cut your t-shirts! ✂️ With just Don’t be afraid to cut your t-shirts! ✂️ With just a few snips you can create a cool custom look on any T-shirt. DIY fashion on a budget! 

#diyfashion #tshirts
Doilies and patchwork for Fall! Today I’ve got an Doilies and patchwork for Fall! Today I’ve got an epic craft filled episode to share. I’m creating fabric patchwork pumpkins that are no sew, dyed doilies, and doily granny denim fashion. #diyfashion #modpodge
Dollar Tree DIY Spooky Halloween Candles! Craft th Dollar Tree DIY Spooky Halloween Candles! Craft these with napkin decoupage and Mod Podge! #dollartree #halloweendecor #crafts
My girls just spent a week at Sleepaway summer cam My girls just spent a week at Sleepaway summer camp. I love this Camp so much. It’s 100 years old, all girls and no phones are allowed.  I like to do a little something special so that each day they have something to remind them of home so I send a letter for each day with a little goodie. #summercamp #sleepawaycamp #camphollywoodland
Episode 4 : learn how to make a resin alphabet to Episode 4 : learn how to make a resin alphabet to create custom backpack and purse charms. These are so cute for back to school! 

Resin 💖 purse charms 💖 diy fashion #resin
Episode 3 🍁 DIY fall flannels with t-shirt appliqu Episode 3 🍁 DIY fall flannels with t-shirt appliqué and distressed painting. I’m using Fabric Mod Podge to create this quick and easy fall fashion! #tutorial
I’m using bathroom bleach and freezer paper to cre I’m using bathroom bleach and freezer paper to create this really cute stenciled bleach design! It’s such a fun way to create a custom pattern on any denim clothing. I’m doing a jean jacket, but you do you….this works with jeans cut off whatever you want.  for the appliqué I’m cutting out a design from a thrift shop hoodie and I use some iron on webbing just to secure that in place and then I sewed around the design with the machine, but you could of course just do a little hand stitch as well. I love how this turned out and I love making DIY looks for myself and the girls.
Episode 2 🍎 Back to School Teacher Gift Ideas with Episode 2 🍎 Back to School Teacher Gift Ideas with Dollar Tree Supplies and napkin decoupage with Mod Podge. 

These are all easy craft ideas that are budget friendly too! 

#dollartree #backtoschool #crafts
DIY Halloween Earrings! I’m using resin and molds DIY Halloween Earrings! I’m using resin and molds to create the spooky shapes. For the colors you can use pigments, mica powder, inks, glitter and paints. These are so fun to make! Let me know if you have any questions about this craft. #resinearrings #craft #halloween
DIY Purse Chains and Charms from Toys! I made this DIY Purse Chains and Charms from Toys! I made this for a special table-read visit to Bob’s Burgers! 🎉 wWhen I got invited… I knew I had to craft something to wear! I got the Louise doll at Five Below! 

These purse charms are easy to make with small toys. A few tips! 

Use beading wire and not stretchy cord. This helps with durability. 

When drilling toys, use a drillbit that is slightly smaller than your eye screw. Add a drop of clue if you would like to have a little extra security.

I like to add jump rings to the ends of my chains, so I can easily take them on and off purses.

these purse chains and charms are so easy to make. I hope you give this DIY a try.
Follow on Instagram

Storage Box Makeovers

https://youtu.be/JvKktgAqa60

Kids Lemonade Recipe

https://youtu.be/X19feCULxOE

How to Photo Transfer

https://youtu.be/5ZzHxJ7hZlM

Faux Geodes and Agate Slices

https://youtu.be/C4Acq_ilD5U

French Country Hutch Makeover

https://youtu.be/oHZ7PanFSaw

Shoe Makeover with Mod Podge

https://youtu.be/YhH9c18JYbg

Liquid Sculpey Pendants 101

https://youtu.be/9QLNgwkQuHk

Explore

4th of july Christmas cocktails Collage Clay Creative Juice Creative Juice Episodes Disneyland diy beauty dollar tree Easter fashion father's day Floral Design furniture flip Game Day halloween home home decor jewelry Kids Kids Crafts mod melter Mod Melts mod molds Mod Podge Mod Podge Fabric new year's eve organization parties party press Recipes recycled resin Round-Ups sculpey Sculpey Polymer Clay sewing shoes tablescapes Teacher Gifts Thanksgiving Universal Studios Valentine's Day weddings

What’s Trending Here

  • YOUTUBE MIWMP - 2017 - 1
  • 15 Mod Podge pumpkin Ideas
  • how to sew tie face mask with filter pocket
  • Sculpey III Geodes Multi Colors 1
  • 15-cone-trees

New Posts

  • How to Make Purse Charms from Toys PLUS my Table Read visit to Bob’s Burgers
  • Red Wine Spritzer Recipe
  • How to Make Corsage Flower Rings for Prom, Weddings and Bridesmaids DIY
  • DIY Junk Patch Trucker Hat for Race Game Day
  • Dollar Tree Craft Easter Egg Garland Fabric Decoupage
  • Dollar Tree Craft Fairy Lights with Wall Decals
  • Best Kid Friendly Chili Recipe Chili Cook Off Winner Aldi Ingredients

Categories

  • 101 Snappy Fashions (26)
  • 101 Tees (35)
  • 45 re-crafting projects (5)
  • Baby Shower (7)
  • bow wow wow (14)
  • Character DIYs (27)
  • Christmas (148)
  • Clay and Resin (28)
  • Craft Wars on TLC (6)
  • Creative Juice Holiday Special (6)
  • diary (129)
  • DIY Beauty (19)
  • DIY Videos (407)
  • Easter (46)
  • Eat and Drink (148)
  • EMMY Awards (15)
  • Fashion (198)
  • Father's Day (15)
  • Furniture Flip (24)
  • Game Day (20)
  • Graduation (2)
  • Halloween (171)
  • HGTV's Creative Juice (69)
  • Home and Garden (283)
  • Hot Glue Gun Helpers (33)
  • HSN and QVC (32)
  • Ideas for Kids and Families (132)
  • Local LA (7)
  • Mod Podge (288)
  • Mother's Day (29)
  • New Year's Eve (22)
  • News + Updates (167)
  • Party Ideas (44)
  • Patroitic (38)
  • PTA School Projects (22)
  • Round-Ups & Friends (20)
  • Scrapbooking (40)
  • Sewing Projects (59)
  • Sponsered + Giveaways (6)
  • St. Patrick's Day (7)
  • Supply Shop (19)
  • Teacher Gifts (28)
  • Thanksgiving (64)
  • The Filian Family (34)
  • Theme Parks & Cool Places (24)
  • Uncategorized (1)
  • Valentines Day (55)
  • Weddings (23)
  • Witch Crafts on HGTV and DIY (22)

Cottage Core DIY Doily Pumpkin for Fall and Halloween Decor

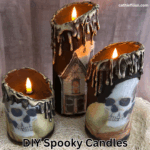
Dollar Tree DIY Spooky Napkin Decoupage Candles with Hot Glue

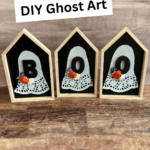
DIY Ghost Art Halloween Decor Craft with Doilies and Mod Podge

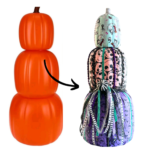
How to Add Fabric to Plastic Stacking Pumpkins with Mod Podge and Dollar Tree Crafts

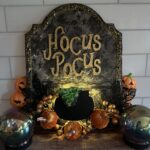
Hocus Pocus DIY Sign How to Makeover Wood Signs with Napkins and Mod Podge

Beetlejuice Movie Night Treat Vanilla Puffed Pop Corn

© 2026 · Pretty Sweet Theme by, Pretty Darn Cute Design · A Genesis Child Theme · Images Courtesy of Lindsay Letters