



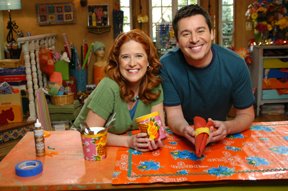
CATHIE FILIAN's Handmade Happy Hour

Crafty Mom - Mess Maker - Content Creator

Find and Follow Me Here!

Facebook240
YouTube40
YouTube
Set Youtube Channel ID
Pinterest15
Pinterest
fb-share-icon
Instagram38
Tiktok46
  • Hello!
    • Hello! I’m Cathie Filian
    • Let’s Link Up!
    • News + Updates
    • The Filian Family
    • Featured On
    • Television
      • Creative Juice – HGTV
      • Craft Wars – TLC
      • Witch Crafts – DIY Network
      • Creative Juice Holiday Special
      • HSN and QVC
      • EMMY Awards
    • Product Design
      • Mod Melter, Molds & Melts
      • Mod Podge Accessories
      • Hot Glue Gun Helpers
      • Jewel Box POP
      • Product Design Awards
    • Books by Cathie
      • 101 Tees
      • 101 Snappy Fashions
      • DecoDen Desserts
      • Bow Wow WOW!
      • Creative Juice Book
      • Contributed + Featured
    • diary
  • YouTube
  • Holidays & Celebrations
    • Christmas
    • Halloween
    • Easter
    • Valentines Day
    • New Year’s Eve
    • St. Patrick’s Day
    • 4th Of July
    • Thanksgiving
    • Weddings
    • Baby Shower
    • Mother’s Day
    • Father’s Day
    • Party Ideas
    • Game Day
    • Graduation
    • Teacher Gifts
  • Character DIYs
  • Crafts
    • Mod Podge Crafts
    • DIY Videos
    • Fashion
    • Sewing Projects
    • DIY Beauty
    • Home and Garden
    • Furniture Flip
    • Clay and Resin
    • Resin
    • Scrapbooking
    • Ideas for Kids and Families
    • PTA School Projects
  • Eat & Drink
  • Hello Crafty Kids
  • HGTV’s Creative Juice
  • Amazon Shop
  • Theme Parks & Cool Places

Episode # 601 – Plastic Fantastic

July 3, 2008 · by: Cathie Filian

Plastic Fantastic on Creative Juice
Thursday – July 3rd on HGTV

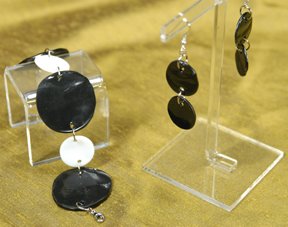
Shrink Plastic Jewelry

Materials:
shrink plastic paper (black & white)
large circle punch
hole punch
large jump rings
embossing heat gun
bamboo skewer
bracelet clasp
round-nose pliers
scissors

Steps:

1. Using a circle punch, punch large circles in the shrink paper.
2. Punch two holes opposite each other on each circle.
3. Draw designs on the circles with metallic pens (for the black shrink paper) and colored pens (on the white paper).
4. Shrink with heat from an embossing gun. Hold the charm in place by inserting a bamboo skewer in the punched hole. Following manufacturer’s directions, the charm can be shrunk in an oven; press with a glass or other flat surface to flatten the charm, if necessary.


5. Using round-nose pliers, link the circles together with large jump rings and attach clasps at each end.
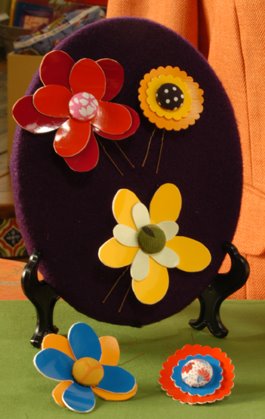
Fresh & Funky Hair Pins

Materials:
shank style self-cover button
tiny scrap of fun fabric (flower center)
colored solid vinyl fabric
scallop scissors or pinking shears
scissors
one U-shaped hairpin
small piece of felt
Fabri-Tac glue

Steps:

1. Using a scrap of coordinating fabric, cut a square slightly larger than the dome of the button. Center the dome on the fabric, bottom side up. Smooth the fabric around the dome and press the overlapping edges into the teeth on the bottom of the button dome.
2. Line the backing piece with the hole over the shank of the dome piece and snap the pieces together.
3. Cut two flower-shapes from two colors of solid vinyl or draw and cut two circle shapes, one slightly larger than the first, with scallop scissors or pinking shears.

4. Pierce the center of the smallest flower shape with the tip of the scissors to create a small slit. Line up the larger flower shape behind the smaller one and position the slit in the same direction.

5. Starting with the largest cut flower, layer the flowers by size, matching the center holes. Working from the top of the cut flower stack, place the shank of the button through the holes.

6. Thread a hairpin through the shank. Next cut a small circle of felt, thread it onto the two ends of the hairpin, secure with a drop of Fabri-Tac glue and let dry.
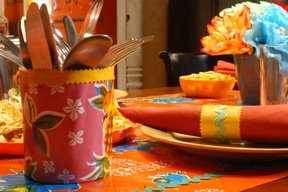
Oilcloth Table Runner and Accessories

Oilcloth Table Runner, Napkin Rings and Silverware Caddy

Materials (caddy):
large yogurt container
scissors
acetone-based nail polish remover
two colors of oilcloth (enough to wrap the container)
pinking shears
kraft paper
tacky glue
clothes pin

Steps:1. Thoroughly wash and dry container; if it has a lip around the top, remove the lip.

2. Use nail polish remover to remove any printed or gummy labels on the container.

3. Wrap a piece of kraft paper around the container and tape in place. Crease the paper where the ends meet to mark the place.

4. Push the top end of the kraft paper into the container and crease the bottom end around the bottom of the container. Remove the paper and, using the crease lines as a guide, trim to make a template.

5. Cut a piece of oilcloth to match the template with 1/2″ added for seam overlaps. Glue the oilcloth to the container.

6. Cut a thin strip from the second color of oilcloth with pinking shears, making sure it’s long enough to wrap around the top edge of the container. Glue the strip to the top edge of the container and use a clothespin to secure the trim until it dries.

Materials (napkin rings):
small scrap of oilcloth fabric
rickrack trim, 7″ per ring
pinking shears
hand needles and sewing thread
tacky glue
ruler
pencil

Steps:1. Working on the back of the oilcloth, use a ruler and pencil to mark a 2″x7″ rectangle. Use pinking sheers to create a zigzag edge.

2. Use tacky glue to attach the rickrack trim across the center of the runner, 1/4″ from the runner edge. Keep it flat and let it dry.

3. Round the rectangle to form a ring, and hand-stitch the ring closed. Add a drop of tacky glue for extra security.

Materials (table runner):
measuring tape
oilcloth fabric (the amount of fabric will depend on the size of the table)
rickrack trim (the amount of trim will depend on the size of the table)
pinking shears
tacky glue
yardstick
pencil
clothespins
painter’s tape or masking tape

Steps:1. Measure the table to determine the size of the runner.

2. Working on the back of the oilcloth, use a yardstick and a pencil to mark the measurements of the runner. Using pinking sheers, cut out the runner.

3. Use tacky glue to attach the trim around the edge of the runner, 2″ from the edge. You can either eyeball the measurement or place small pieces of painter’s tape 2″ from the edge at regular intervals to serve as a guide.

4. At a corner, fold the rickrack over at a 90-degree angle (rather than cutting it) to create a mitered corner; glue it in place. If needed, secure with a clothespin to keep it flat while the glue dries.


(Visited 197 times, 1 visits today)

Posts you might be interested in......

  • New House: piece by piece

    Progression on the side back…

  • Make a Cake with Carnation Flowers

    Floral Cakes are simple to…

  • Champagne 101

    Just in time for New…

  • DIY: Paper Flower Cupcake Toppers

    CUPCAKES for Sissy!I love serving…

Category: Home and Garden

Follow Us

Facebooktwitterpinterestrssyoutubeinstagram
❮ ❮ Fourth of July Craft Project !
Count Down To QVC ❯ ❯

Comments

  1. Cyndi says

    July 4, 2008 at 1:36 pm

    Wow! great projects. can’t wait to try the shrink paper bracelet! thanks for posting these!
    cyndi

Trackbacks

  1. Jewelry Project Archive says:
    April 3, 2015 at 7:19 pm

    […] Necklace Altered Photo Pendants Grown Up Paper Beads Crochet Charm Teen Necklaces Flower Hair Pins Teen Shrink Plastic Jewelry Bottle Cap Charms Mod Podge Necklaces  Chunky Rings Recycled Eyeglass Pins Altered […]

Find and Follow Me Here!

Facebook240
YouTube40
YouTube
Set Youtube Channel ID
Pinterest15
Pinterest
fb-share-icon
Instagram38
Tiktok46

Search

Shop my Amazon Store! I earn from qualifying purchases.

Cathie Filian

Follow along on my adventures!

Facebooktwitterpinterestrssyoutubeinstagram

Creative Juice on Discovery+

USA Embroidery Kits – Home Sweet Stitch – Now Available at ALL Walmart Stores!

New Videos at TikTok!

InstaLOVE

cathiefilian

DIY Halloween Spell Book! Create a Ghost Story Dio DIY Halloween Spell Book! Create a Ghost Story Diorama inside the pages of a book....Plus learn tips and tricks for creating spooky book covers! When crafting with books, please do so responsibly. Ask your local libraries and thrift shops for free books that are being sent to recycling. #halloween #crafts #halloweendecor
Elevate your game day purse with a DIY bag charm a Elevate your game day purse with a DIY bag charm and football patch! This tutorial is so quick and easy… and perfect for clear stadium bags! #diy #gameday #gamedayoutfit
Come with me… A day at YouTube… with Walmart and D Come with me… A day at YouTube… with Walmart and Dental Digest! So much fun and always something new to learn! #contentcreator
Midsummer Scream! It was such a blast and we met s Midsummer Scream! It was such a blast and we met so many cool people. Sophia got to try on Dracula’s cape! We met the OG actors from Scream and Bob Gurr! The Universal booth was so cool! #midsummerscream #halloween #horrorgram
Photo Transfer 101! Learn all the steps to transfe Photo Transfer 101! Learn all the steps to transfer your photos to fabric! I love doing this for customized gifts! #phototransfer #crafts #diy #handmade
Napkin Decoupage Sea Shells! These make adorable d Napkin Decoupage Sea Shells! These make adorable decor and gifts! I’m using satin Mod Podge and gold paint. #diy #crafts #beachvibes
DIY Dollar Tree Haunted House Decoupage Pumpkin! M DIY Dollar Tree Haunted House Decoupage Pumpkin! Made with Mod Podge, paper napkins and a toy dollhouse from Dollar Tree. Add fairy lights for a glow look! #crafts #dollartree #halloween
DIY Map Jewelry that looks boutique! Easy Mod Podg DIY Map Jewelry that looks boutique! Easy Mod Podge Hack!  I love making these necklaces as gifts, you can customize the pendants to any city! This decoupage technique works with scrapbook paper too. The glass like finish is Mod Podge Dimensional Magic. 

#Modpodge #jewelrymaking
Transform Dollar Tree plates into Halloween magic Transform Dollar Tree plates into Halloween magic with napkin decoupage and Mod Podge! #diy #crafts #halloween
DIY a Halloween rib cage dress! I’m using Mod Podg DIY a Halloween rib cage dress! I’m using Mod Podge, paint and lace to create custom spooky Halloween fashion! I started with a plain black dress but you can do this on any color. #diy #halloweencostume #halloween
Don’t be afraid to cut your t-shirts! ✂️ With just Don’t be afraid to cut your t-shirts! ✂️ With just a few snips you can create a cool custom look on any T-shirt. DIY fashion on a budget! 

#diyfashion #tshirts
Doilies and patchwork for Fall! Today I’ve got an Doilies and patchwork for Fall! Today I’ve got an epic craft filled episode to share. I’m creating fabric patchwork pumpkins that are no sew, dyed doilies, and doily granny denim fashion. #diyfashion #modpodge
Dollar Tree DIY Spooky Halloween Candles! Craft th Dollar Tree DIY Spooky Halloween Candles! Craft these with napkin decoupage and Mod Podge! #dollartree #halloweendecor #crafts
My girls just spent a week at Sleepaway summer cam My girls just spent a week at Sleepaway summer camp. I love this Camp so much. It’s 100 years old, all girls and no phones are allowed.  I like to do a little something special so that each day they have something to remind them of home so I send a letter for each day with a little goodie. #summercamp #sleepawaycamp #camphollywoodland
Episode 4 : learn how to make a resin alphabet to Episode 4 : learn how to make a resin alphabet to create custom backpack and purse charms. These are so cute for back to school! 

Resin 💖 purse charms 💖 diy fashion #resin
Episode 3 🍁 DIY fall flannels with t-shirt appliqu Episode 3 🍁 DIY fall flannels with t-shirt appliqué and distressed painting. I’m using Fabric Mod Podge to create this quick and easy fall fashion! #tutorial
I’m using bathroom bleach and freezer paper to cre I’m using bathroom bleach and freezer paper to create this really cute stenciled bleach design! It’s such a fun way to create a custom pattern on any denim clothing. I’m doing a jean jacket, but you do you….this works with jeans cut off whatever you want.  for the appliqué I’m cutting out a design from a thrift shop hoodie and I use some iron on webbing just to secure that in place and then I sewed around the design with the machine, but you could of course just do a little hand stitch as well. I love how this turned out and I love making DIY looks for myself and the girls.
Episode 2 🍎 Back to School Teacher Gift Ideas with Episode 2 🍎 Back to School Teacher Gift Ideas with Dollar Tree Supplies and napkin decoupage with Mod Podge. 

These are all easy craft ideas that are budget friendly too! 

#dollartree #backtoschool #crafts
DIY Halloween Earrings! I’m using resin and molds DIY Halloween Earrings! I’m using resin and molds to create the spooky shapes. For the colors you can use pigments, mica powder, inks, glitter and paints. These are so fun to make! Let me know if you have any questions about this craft. #resinearrings #craft #halloween
DIY Purse Chains and Charms from Toys! I made this DIY Purse Chains and Charms from Toys! I made this for a special table-read visit to Bob’s Burgers! 🎉 wWhen I got invited… I knew I had to craft something to wear! I got the Louise doll at Five Below! 

These purse charms are easy to make with small toys. A few tips! 

Use beading wire and not stretchy cord. This helps with durability. 

When drilling toys, use a drillbit that is slightly smaller than your eye screw. Add a drop of clue if you would like to have a little extra security.

I like to add jump rings to the ends of my chains, so I can easily take them on and off purses.

these purse chains and charms are so easy to make. I hope you give this DIY a try.
Follow on Instagram

Storage Box Makeovers

https://youtu.be/JvKktgAqa60

Kids Lemonade Recipe

https://youtu.be/X19feCULxOE

How to Photo Transfer

https://youtu.be/5ZzHxJ7hZlM

Faux Geodes and Agate Slices

https://youtu.be/C4Acq_ilD5U

French Country Hutch Makeover

https://youtu.be/oHZ7PanFSaw

Shoe Makeover with Mod Podge

https://youtu.be/YhH9c18JYbg

Liquid Sculpey Pendants 101

https://youtu.be/9QLNgwkQuHk

Explore

4th of july Christmas cocktails Collage Clay Creative Juice Creative Juice Episodes Disneyland diy beauty dollar tree Easter fashion father's day Floral Design furniture flip Game Day halloween home home decor jewelry Kids Kids Crafts mod melter Mod Melts mod molds Mod Podge Mod Podge Fabric new year's eve organization parties party press Recipes recycled resin Round-Ups sculpey Sculpey Polymer Clay sewing shoes tablescapes Teacher Gifts Thanksgiving Universal Studios Valentine's Day weddings

What’s Trending Here

  • YOUTUBE MIWMP - 2017 - 1
  • 15 Mod Podge pumpkin Ideas
  • how to sew tie face mask with filter pocket
  • Sculpey III Geodes Multi Colors 1
  • 15-cone-trees

New Posts

  • How to Make Purse Charms from Toys PLUS my Table Read visit to Bob’s Burgers
  • Red Wine Spritzer Recipe
  • How to Make Corsage Flower Rings for Prom, Weddings and Bridesmaids DIY
  • DIY Junk Patch Trucker Hat for Race Game Day
  • Dollar Tree Craft Easter Egg Garland Fabric Decoupage
  • Dollar Tree Craft Fairy Lights with Wall Decals
  • Best Kid Friendly Chili Recipe Chili Cook Off Winner Aldi Ingredients

Categories

  • 101 Snappy Fashions (26)
  • 101 Tees (35)
  • 45 re-crafting projects (5)
  • Baby Shower (7)
  • bow wow wow (14)
  • Character DIYs (27)
  • Christmas (148)
  • Clay and Resin (28)
  • Craft Wars on TLC (6)
  • Creative Juice Holiday Special (6)
  • diary (129)
  • DIY Beauty (19)
  • DIY Videos (407)
  • Easter (46)
  • Eat and Drink (148)
  • EMMY Awards (15)
  • Fashion (198)
  • Father's Day (15)
  • Furniture Flip (24)
  • Game Day (20)
  • Graduation (2)
  • Halloween (171)
  • HGTV's Creative Juice (69)
  • Home and Garden (283)
  • Hot Glue Gun Helpers (33)
  • HSN and QVC (32)
  • Ideas for Kids and Families (132)
  • Local LA (7)
  • Mod Podge (288)
  • Mother's Day (29)
  • New Year's Eve (22)
  • News + Updates (167)
  • Party Ideas (44)
  • Patroitic (38)
  • PTA School Projects (22)
  • Round-Ups & Friends (20)
  • Scrapbooking (40)
  • Sewing Projects (59)
  • Sponsered + Giveaways (6)
  • St. Patrick's Day (7)
  • Supply Shop (19)
  • Teacher Gifts (28)
  • Thanksgiving (64)
  • The Filian Family (34)
  • Theme Parks & Cool Places (24)
  • Uncategorized (1)
  • Valentines Day (55)
  • Weddings (23)
  • Witch Crafts on HGTV and DIY (22)

Cottage Core DIY Doily Pumpkin for Fall and Halloween Decor

Dollar Tree DIY Spooky Napkin Decoupage Candles with Hot Glue

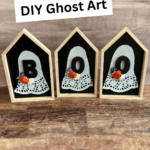
DIY Ghost Art Halloween Decor Craft with Doilies and Mod Podge

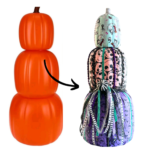
How to Add Fabric to Plastic Stacking Pumpkins with Mod Podge and Dollar Tree Crafts

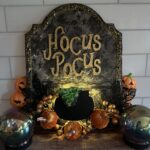
Hocus Pocus DIY Sign How to Makeover Wood Signs with Napkins and Mod Podge

Beetlejuice Movie Night Treat Vanilla Puffed Pop Corn

© 2026 · Pretty Sweet Theme by, Pretty Darn Cute Design · A Genesis Child Theme · Images Courtesy of Lindsay Letters